
FREE DIY SERIES #2 - chopsticks
SAFETY TIPS:
Always keep the blade pointed away from you when carving
Keep your tools sharp for easier and safer carving!
WARNING: Tools are extremely sharp and may cause injury. Please handle with caution.
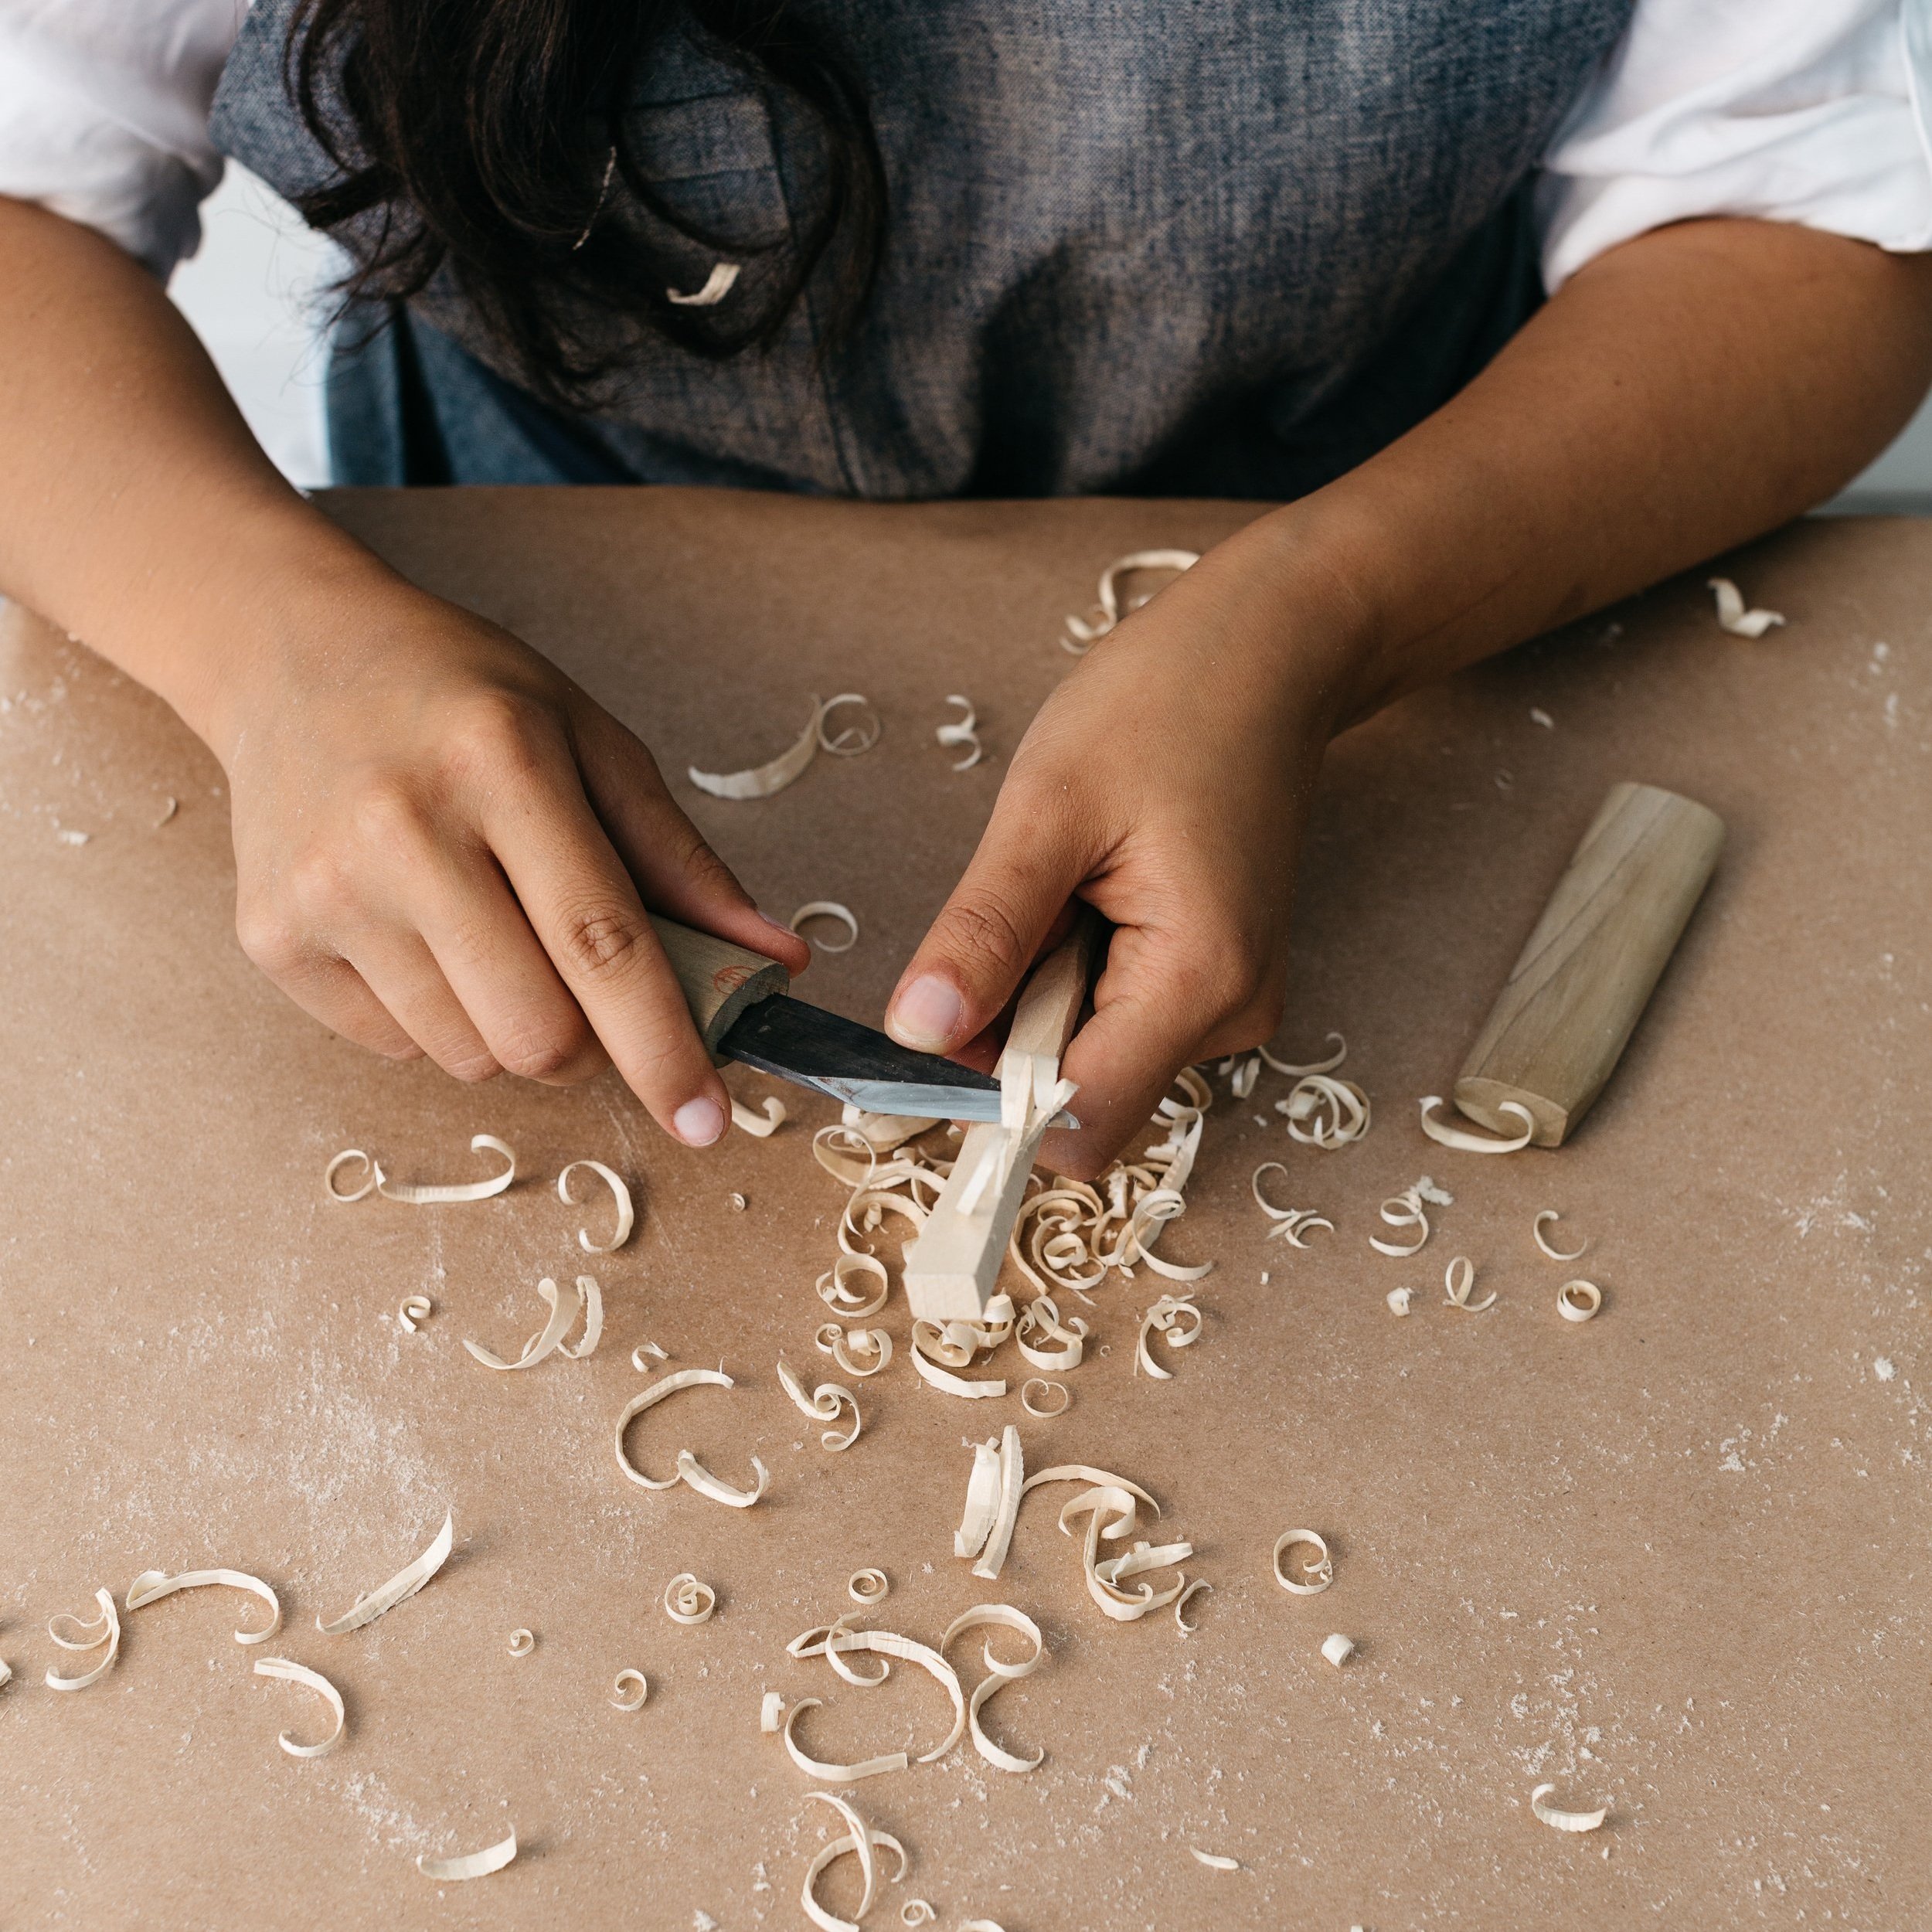
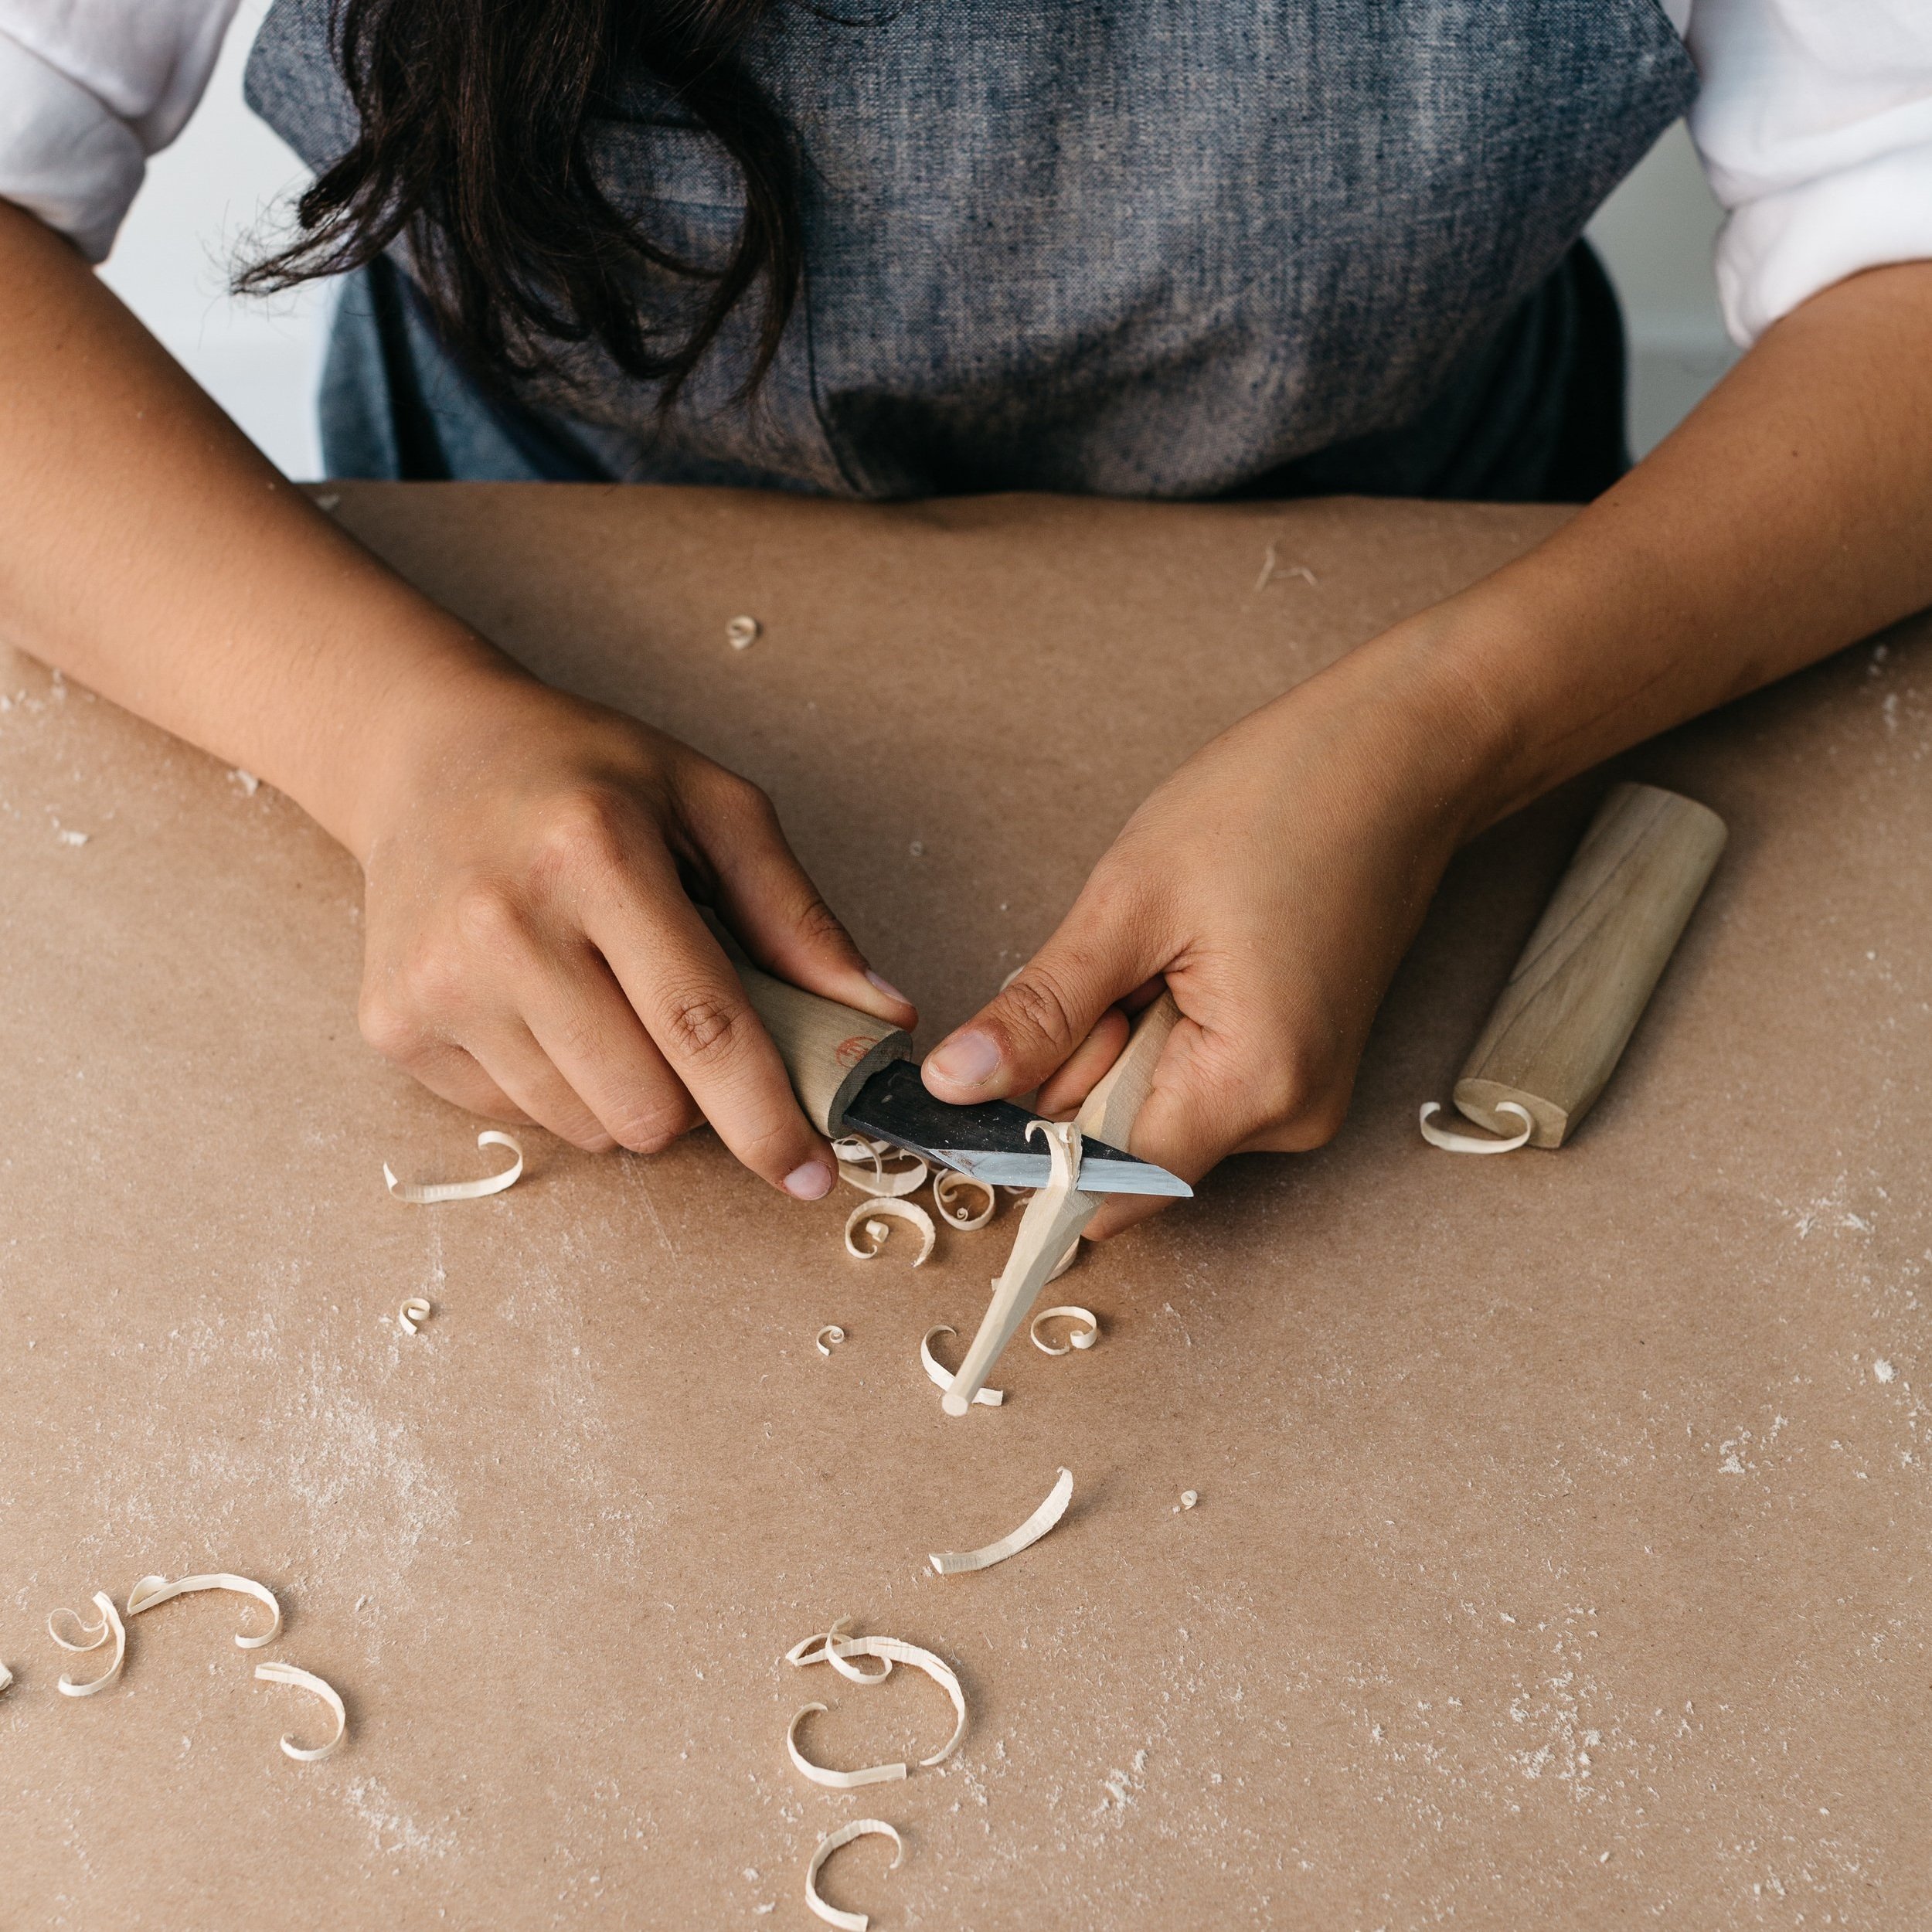
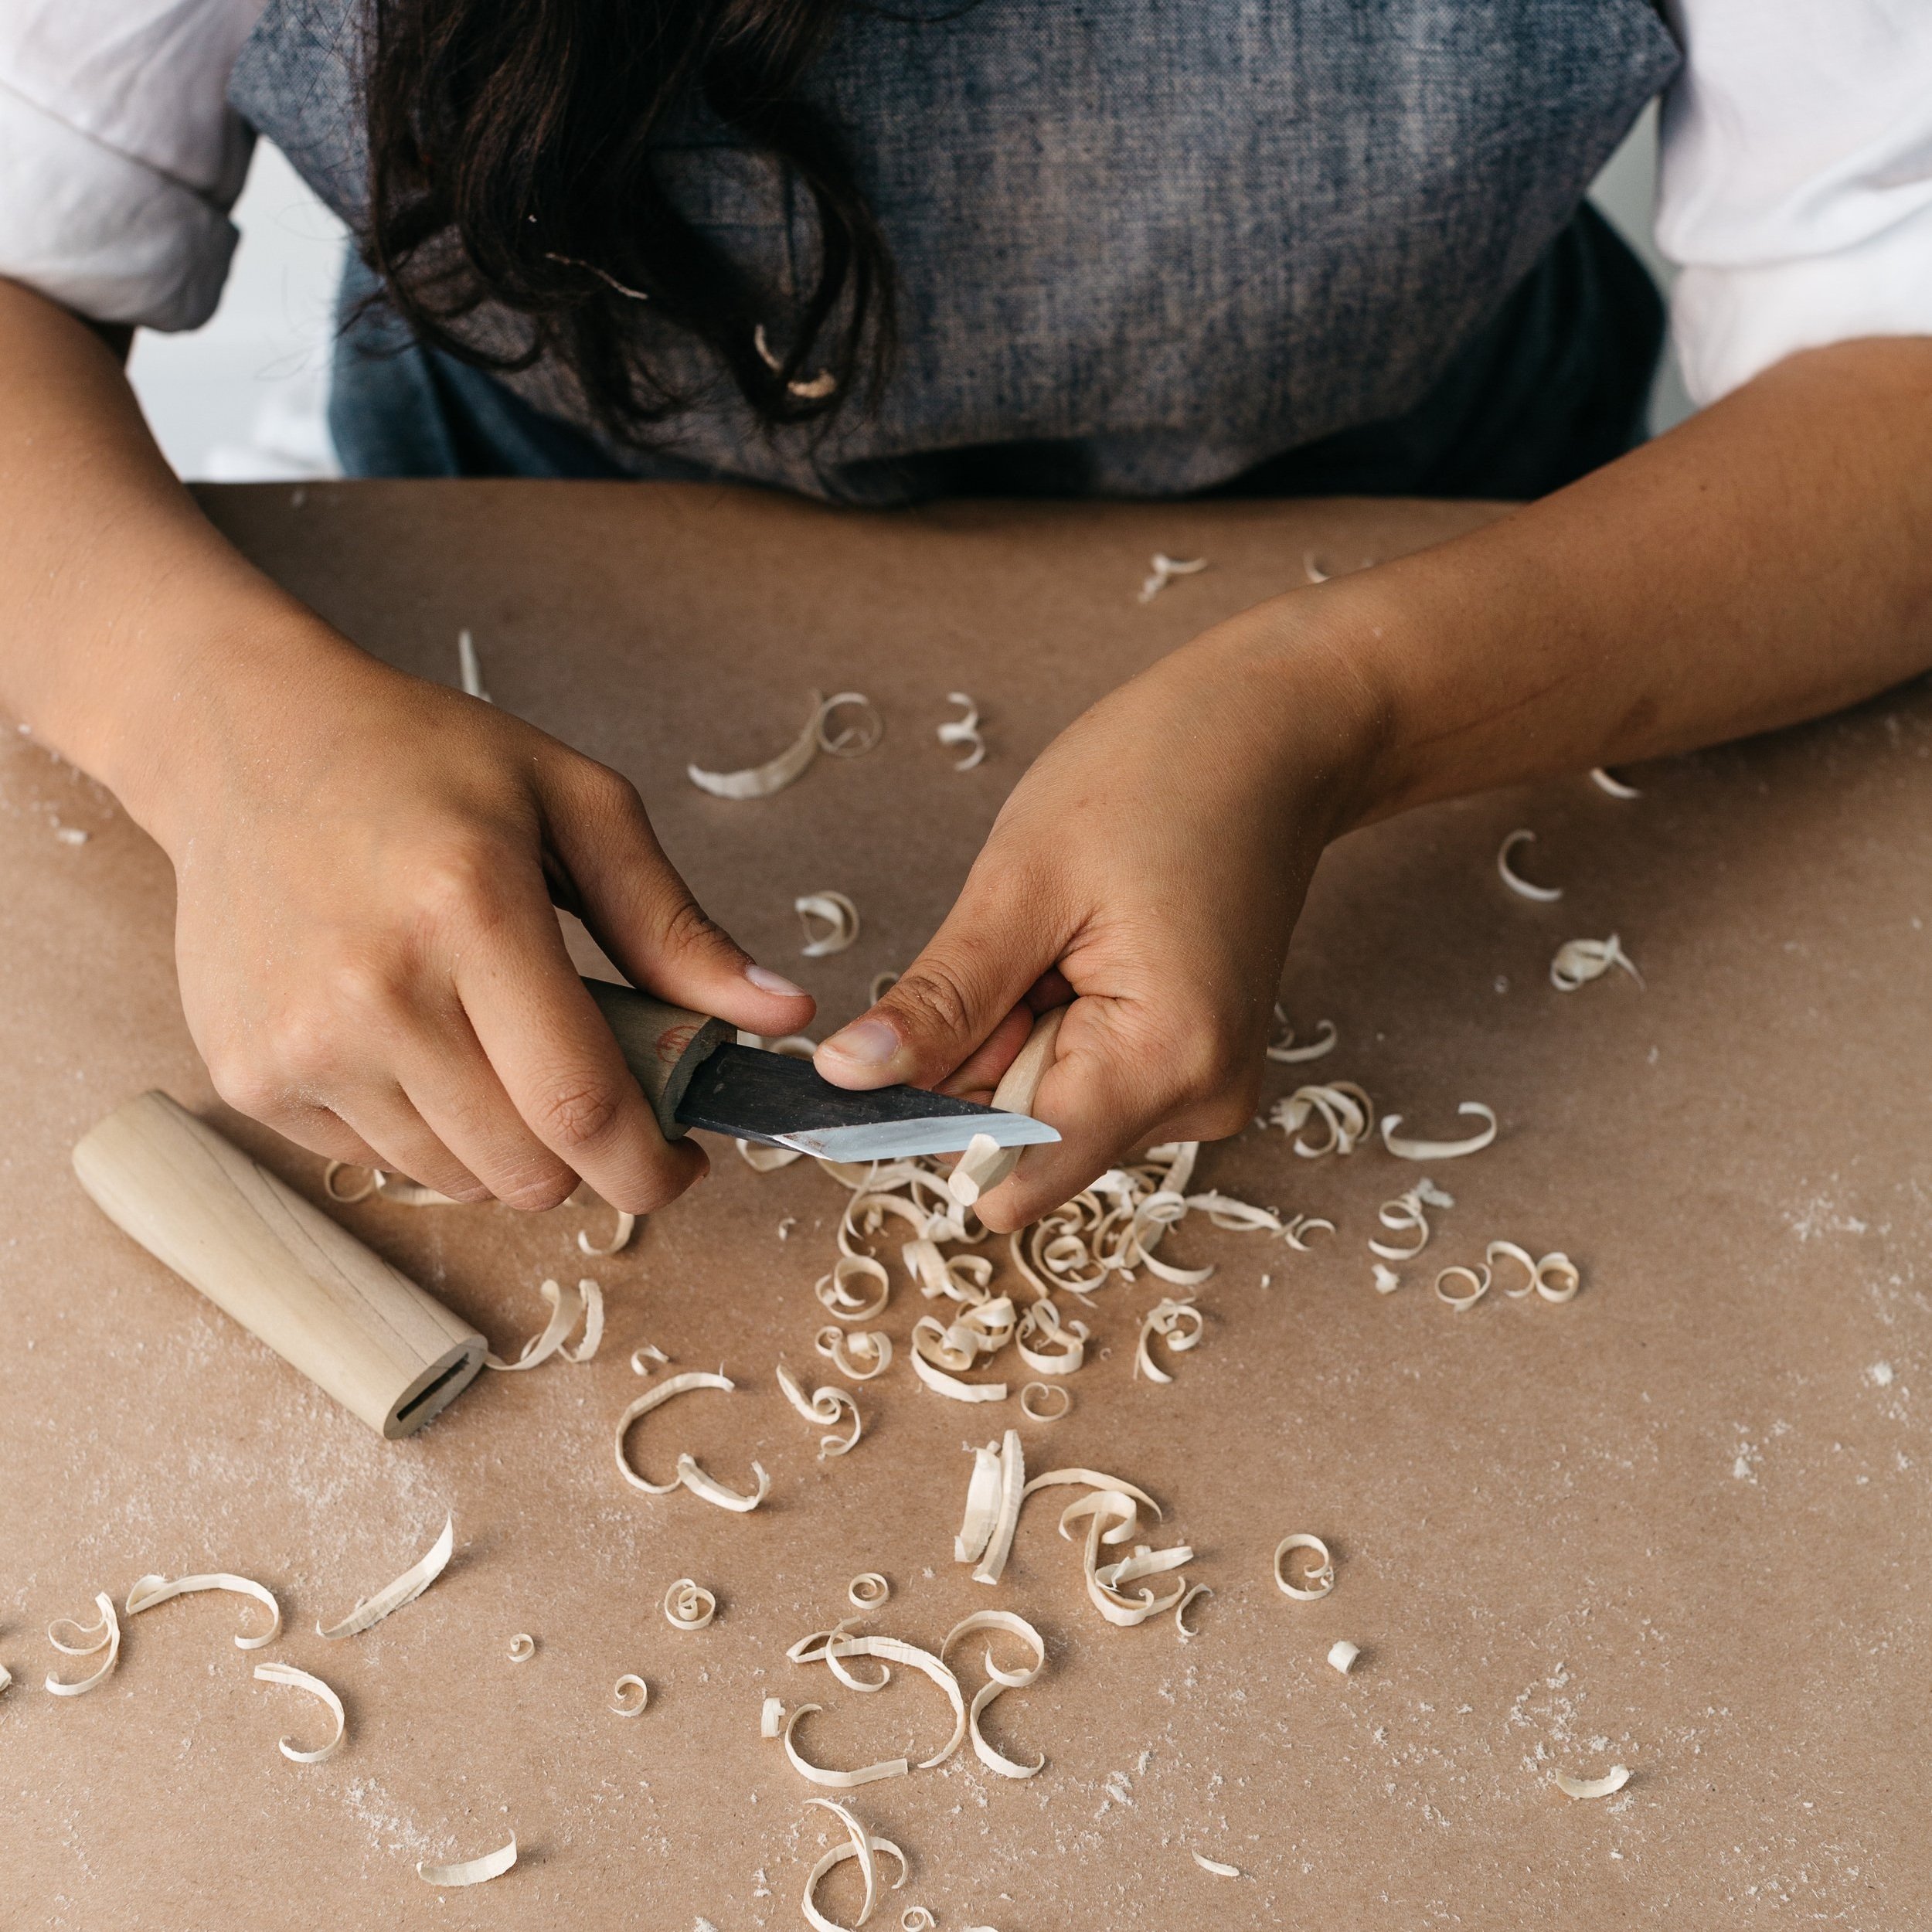
Step 1: Carve the chopsticks
Use the whittling knife to pare one piece of wood down to a long cylinder.
Take long, thin push-cut strokes with the grain from the middle of the wood to the end.
Rotate the wood as you cut to achieve an even shape; because the piece is thin, be careful not to remove large chunks all at once. Repeat with the second piece of wood.
Taper one chopstick to about 3/8 inch in diameter at one end and 1 centimeter at the other end (use the template on page 120, or you can measure it with a ruler). Repeat with the second chopstick.
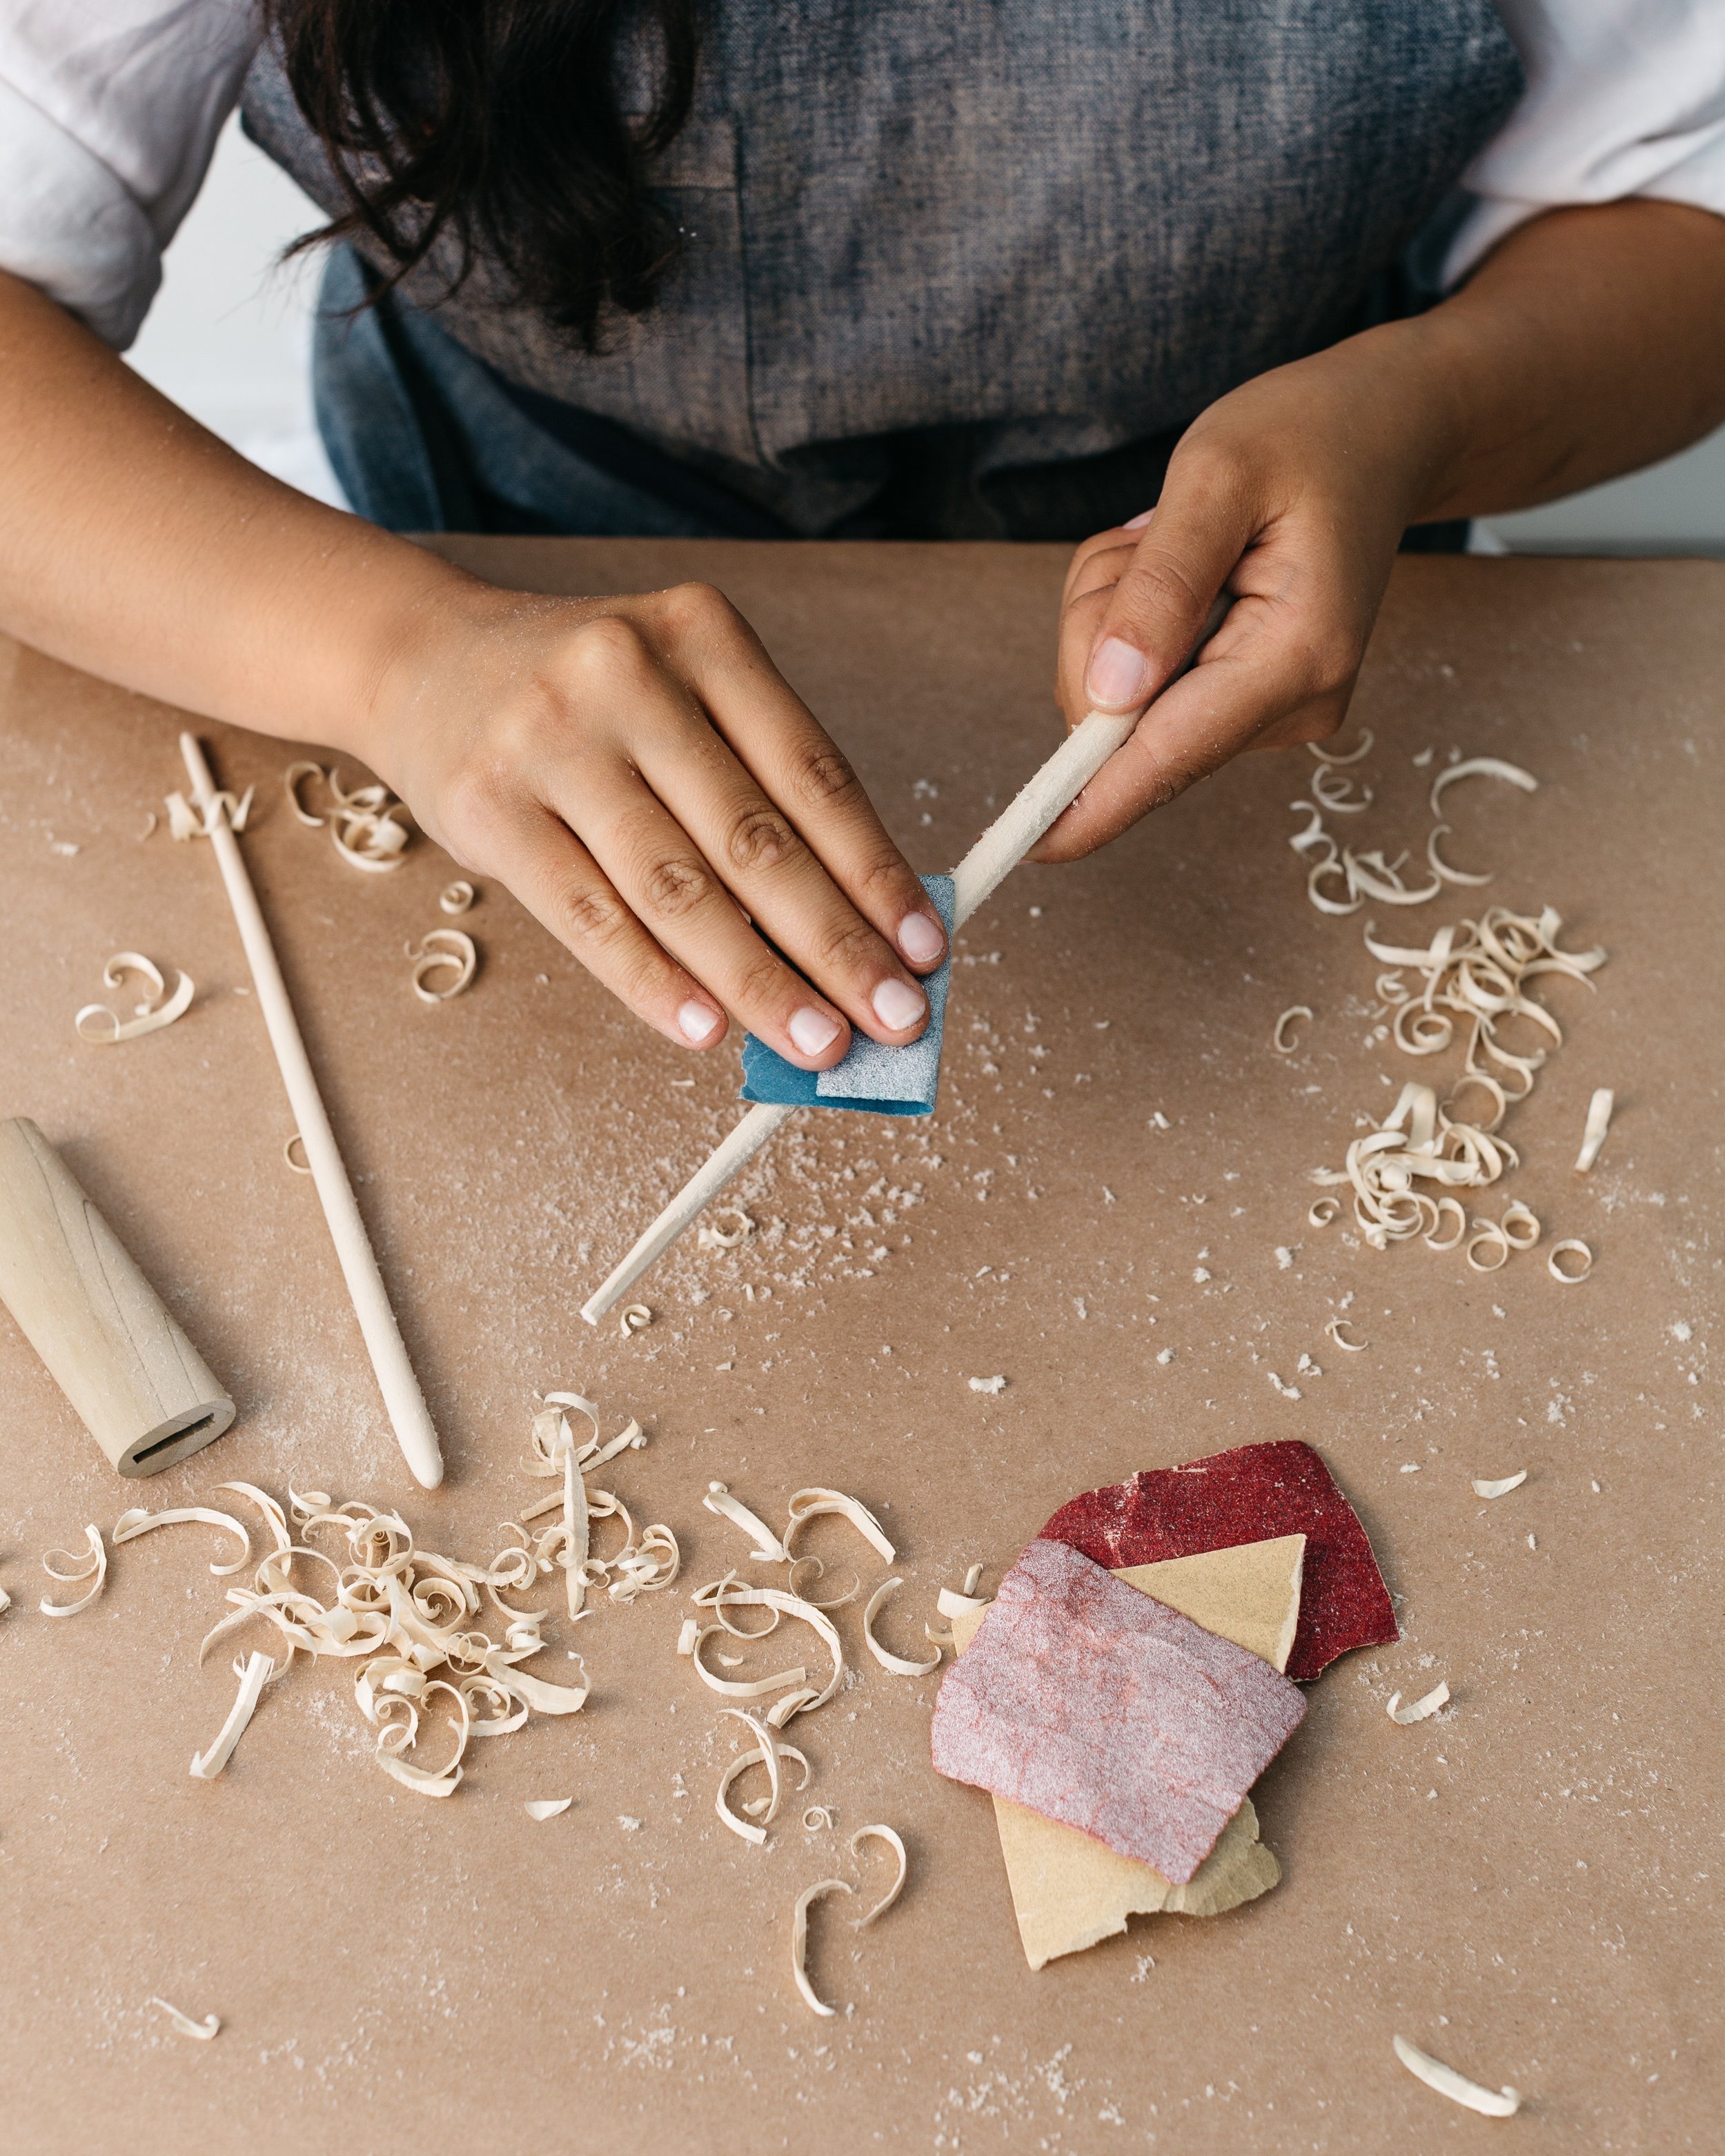
sTEP 2: Sand AND FINISH
Sand the chopsticks with the grain until the wood is smooth and no knife marks remain.
Begin sanding with the 100 grit and work your way up to the 220 grit as each sandpaper dulls.
Use the cotton cloth to rub the chopsticks with a layer of mineral oil and let dry for at least 30 minutes.
Reapply the oil as needed, after washing the chopsticks by hand, especially if you use them as much as I use mine.
TIP: Once you get more comfortable with whittling techniques, you can personalize these chopsticks by adding details like notches, spirals, or a ball to the top of the handle before you sand it. Or embellish the ends by dipping them in paint (just not the ends you use to eat).
REQUIRED TOOLS

Mikikichan Knife - $33

Bench Hook - $28

Chopsticks Blank - $17